This tool helps you quickly separate scanned student work into individual PDF files. It uses coversheets with unique identifiers to automate the process.
Download
Installing
- Download the ZIP File: Download the ZIP file containing the application.
- Extract the Contents: Locate the downloaded ZIP file. You will need to “unzip” or “extract” its contents.
- On most systems, you can do this by right-clicking the ZIP file. Once you select “extract”, this will create a folder with the application (
StudentWorkScanningToolorStudentWorkScanningTool.exe) and other necessary files.
- On most systems, you can do this by right-clicking the ZIP file. Once you select “extract”, this will create a folder with the application (
- Run the Application: Open the extracted folder. You can now run the application by double-clicking the application file.
- (Optional) Create a Shortcut: For easier access, you can create a shortcut to the application:
- Windows: Right-click on
StudentWorkScanningTool.exeand look for an option like “Create shortcut.” - macOS: Right-click on
StudentWorkScanningTooland select “Make Alias.” - You can then drag the created shortcut or alias to your desktop or another convenient location.
- Windows: Right-click on
Preparing Your Work
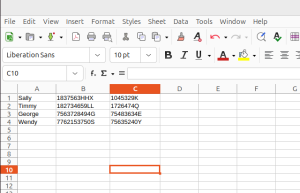
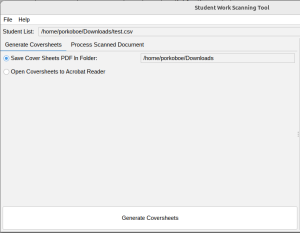
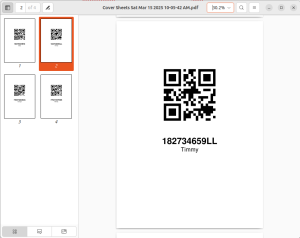
First, you need a student list in CSV format. This file should contain the student information the application uses. Next, open the application and go to the “Generate Coversheets” tab. Select your student list CSV file. You can choose where to save the generated coversheet PDF, and you have the option to open the coversheets directly in Adobe Acrobat Reader. Click “Generate Coversheets” to create the coversheets. Print these coversheets, as they are essential for the next step.
Preparing for Scanning
After printing, carefully place the correct coversheet at the very beginning of each student’s work. It is vital that the coversheet is the first page. Organize the student work and coversheets in the same order as the student list. This ensures the application correctly identifies each student’s submission.
Scanning and Processing
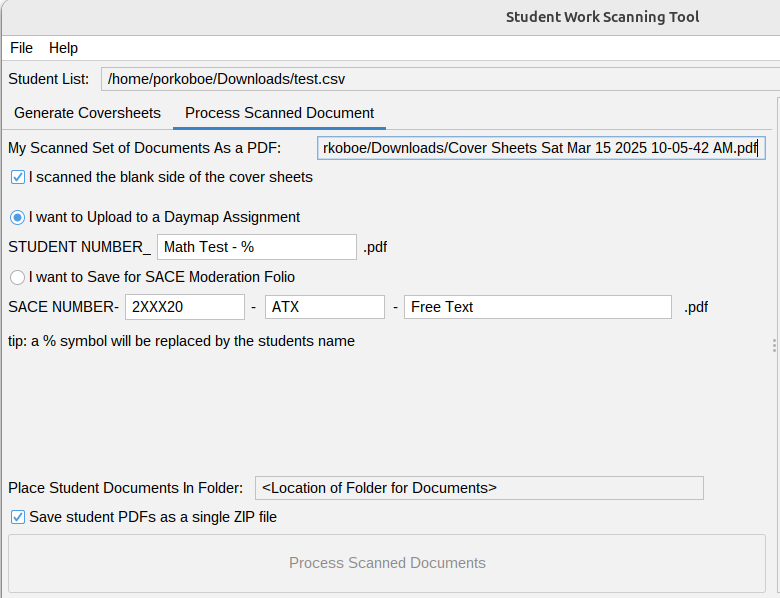
Now, scan all the prepared student work (coversheet plus student submission) into a single PDF file. Once the scanning is complete, go to the “Process Scanned Document” tab in the application. Select the scanned PDF file you just created. If you scanned the blank side of the coversheets, make sure to check the box that says “I scanned the blank side of the cover sheets”.
You can now choose how you want the individual student files to be named. For Daymap uploads, select the “I want to Upload to a Daymap Assignment” option. The application will use a naming convention where the student’s name replaces the “%” symbol in the filename. For SACE moderation folios, choose the “I want to Save for SACE Moderation Folio” option, and enter the required SACE number, ATX code, and any free text.
Choose the folder where you want the individual student PDF files to be saved. You can also choose to save all the individual student PDFs into a single ZIP file by checking the “Save student PDFs as a single ZIP file” option. Finally, click the “Process Scanned Documents” button to start the file separation and naming process.
The application will process the scanned document using the information on the coversheets to create individual PDF files for each student. These files will be named according to your chosen convention and saved in the selected folder.
Important Notes
The application relies heavily on the coversheets. Make sure each student’s work has a coversheet, that the coversheet is placed correctly at the beginning, and that the order of the documents matches the student list. System messages will appear on the right side of the application window during processing. Font loading errors are generally not critical and do not affect the application’s main function.
This tool simplifies the task of separating and naming student work, saving you time and effort.